


A Quick Guide to High-Pressure Laminate Installation
Thinking of doing a quick home improvement project? If the answer is yes, then HPL sheets may be for you!
Thinking of doing a quick home improvement project? If the answer is yes, then you’ve come to the right place! This HPL installation guide will give you an insight into what HPL is for and how to use it for your home projects.
But before we go into the installation process, let’s talk about High-Pressure Laminates as a home improvement product.
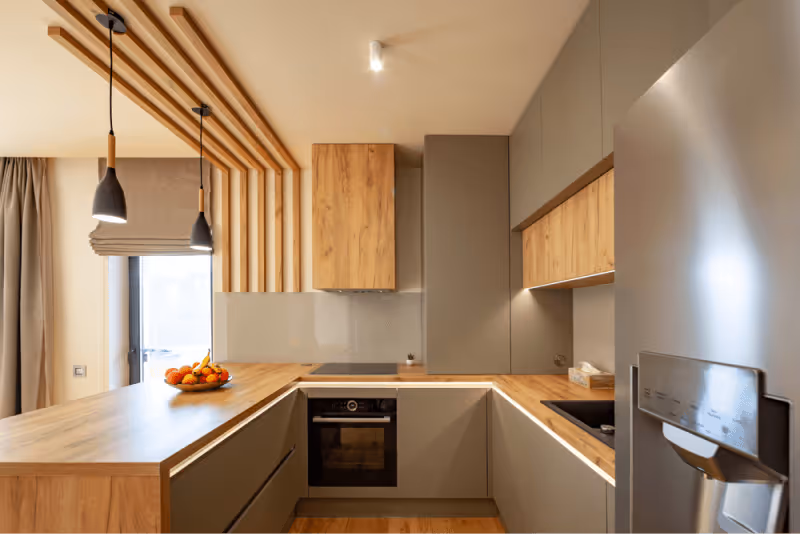
Achieving Elegant Designs with High-Pressure Laminates
HPL is a construction material used as a finishing product for surfaces. Builders and designers prefer this material for its wide range of designs, and because it can withstand the wear and tear of everyday use.
They come in various textured sheets, woodgrain sheets, solid colors, and specialty sheets like metal or marbled patterns. You can choose from a number of designs to mix and match for your project, given the wide design selections available.
How to Install HPL For Your Projects
Now that you know what HPL sheets are, we can provide an insight into what you can expect when using HPL panels for your home’s interior design.
There are many applications for high-pressure laminates. You can use it as an accent to make your rooms feel warmer, and you can use it on furniture and fittings, like tables and cabinets, to give off that “Team Kahoy” look.
Regardless of how you decide to use it, HPL will definitely beautify your space.
An Insight to High-Pressure Laminate Installation
Learning how to install HPL is actually easy to understand. Once you know more about it, you can account for your budget and timeline, and have better projections for your home improvement plans.
This guide will be your key to understanding how professionals work and give you a deeper appreciation of the effort that goes into it. Knowing the process will help you anticipate what the project and the workers will need.
With that being said, here’s a quick insight into HPL installation.
Tools and Materials
The only material that you would typically prepare is just the laminates and the contact cement––which is the adhesive. If you’re ordering the laminates from a different supplier than where your installers work from, then it’s best to order and prepare them ahead of time.
However, if you’re buying from a supplier that has installers that can help you with your project, you can request them to bring all the necessary materials when they come to your home. That way, you won’t have to worry about anything else but monitoring the project.
Installing on Surfaces
As you watch the professionals do their jobs, you might be curious about what they’re doing or why they’re doing this and that. A common question for example is “Why is he cutting the laminate bigger than the size of the surface?”
Well, this basic step-by-step process on how to install laminates on a panel board will answer that question and other questions you may have.
Panel Installation
Installing on different panels is the most common practice with HPL. Be it a wooden tabletop or the panels of wooden cabinets, the idea is mostly the same.
Here are the steps on how to install HPL on a wooden panel:
- The panel and its sides are measured using a metal tape measure. For this step-by-step guide, let’s assume that the panel is sized around 120 cm in length x 60cm in width.
- The laminate is then marked with the same size as the panel but with about a 3-5 cm allowance per side. So, the size of the HPL sheet should be 130 cm in length x 70 cm in width.
- The HPL sheet is then cut using a circular saw according to the measurements that were marked.
- After cutting, the laminate will be tested to see if it fits the panel’s surface to make sure the measurements are right and that the whole surface would be covered by the HPL sheet.
- Usually, the installers make sure that the panel is flat, clean, and dry before they start putting the contact cement to avoid lumps or “bubbles” in the installation.
- After making sure that the panel and cut laminate are ready, an amount of the contact cement is spread out on the back of the laminate and on the panel’s surface.
- The applied contact cement is then left to dry for about 30 minutes to an hour before putting the cut HPL sheet onto the panel’s surface.
- When both cemented surfaces are ready, the HPL sheet is placed on the panel to stick them together.
- When the newly laminated panel is fully dry, the sides are trimmed to remove any excess laminates on the surface.
- The finishing touch would be to use a hand file to smoothen out the sides of the laminated panel to avoid any injuries for those who would use it.
These are just the basic steps associated with installing laminate on panels. Keep in mind that additional steps such as screwing panels together may be needed in more tedious projects such as building furniture or fittings. Additionally, when installing high-pressure laminates on walls, note the cuts have to be precise. Unlike applying laminates to panels, adding allowances to the size of the laminate is not applicable since there won’t be room to trim it.
So, Should You Engage in a DIY HPL installation or Have Professionals Install the Sheets?
Short answer: it’s best to have professionals install the sheets for you.
While doing DIY projects is always a fun and great idea, you would have to account for other factors like getting all the equipment and going through trial and error with your materials, which may cost you more in the long run. If you want to save not just on time but resources as well, it’s best to leave it with experienced workers to avoid any mistakes in the installation process.
Why Choose HPL for Your Home Improvement Projects?
The great thing about using high-pressure laminates is that you can use them on almost all surfaces! It can be used for your kitchen, living room, bedroom, and any other room you may have. It’s a durable and versatile product with a lot of applications you can imagine.
The range of patterns available can help you give life to the designs you visualized without having to source other different materials that could end up being costly. It’s a great and simple way to improve your interior design with just a few steps.
Decocity: Your Laminate Partner
Now that you know all about high-pressure laminate installation, you can go ahead and start your project!
Consider using HPL to make your furniture and fittings pop and wow your guests or clients with your great designs.
Here at Decocity, we offer high-quality HPL sheets for your construction needs. We have a variety of solid color sheets, woodgrain sheets, and textured sheets. Our products are durable and can withstand daily wear and tear, is affordable, and is perfect for long-term use.
We offer a lot of different construction products––the best choice as your interior design materials supplier!
Check out our website to browse our merchandise or contact us for any inquiries.